Sheet Metal Bending & Forming
Press-brake forming that turns a flat, laser-cut blank into a three-dimensional bracket, enclosure, or panel — the step where geometry and bend sequence actually determine whether the part fits.
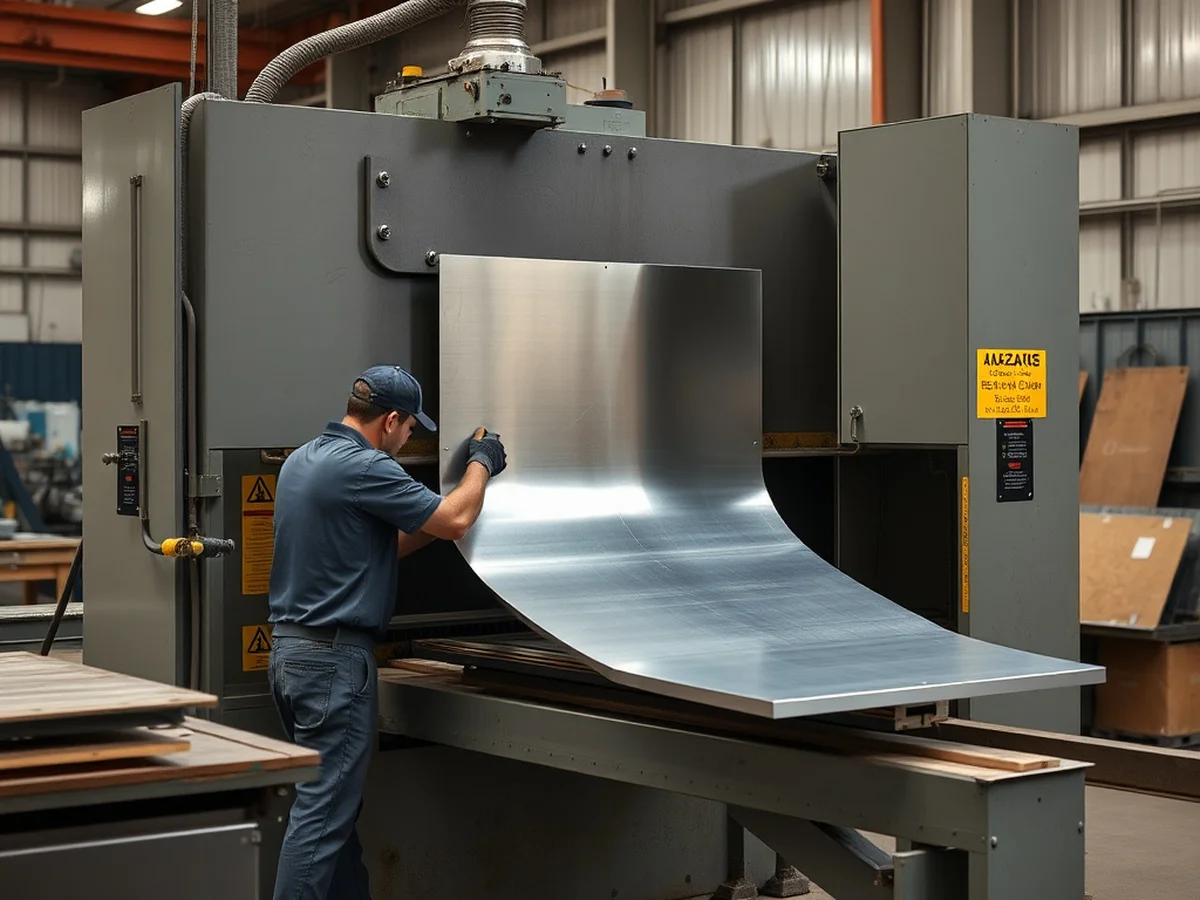
Sheet metal bending and forming takes a flat blank — typically laser-cut to a developed flat pattern — and forms it into a three-dimensional part using a press brake, applying controlled force along a straight line to create an accurate bend at a specified angle and radius. It's the step that turns a flat profile into an enclosure, a formed bracket, or a channel.
Getting a formed part right starts well before the press brake, in the flat pattern itself. Bend allowance, bend sequence, and where features land relative to a bend line all have to be planned into the flat pattern so the finished part's dimensions land where the drawing says they should — a mistake here is much more expensive to fix after forming than to catch on the flat pattern.
This page covers what affects bend accuracy and repeatability, how material and thickness change what's achievable, and what to include in your RFQ so a formed part quotes accurately the first time.
What You Get
- Converts a flat, laser-cut blank into a finished 3D bracket, enclosure, or panel geometry
- Bend angle and radius held to a specified tolerance, confirmed against your drawing before production
- Handles single bends through multi-bend, multi-sided enclosure geometry in one setup sequence
- Available across carbon steel, stainless, and aluminum, each with material-specific bend allowance planning
- Scales from a single formed prototype to a production run using the same flat-pattern program
Ideal For
- Enclosures, covers, and housings formed from a single flat blank with multiple bends
- Structural brackets and channels where the formed shape carries load, not just a flat mounting plate
- Parts that need a specific bend radius or angle called out for fit against a mating component
- Multi-bend geometry where bend sequence affects whether later bends are even reachable
Why Bend Sequence and Flat Pattern Planning Matter
A part with multiple bends has to be formed in a specific order, because each bend can change what's reachable for the press brake tooling on the next one. A bend sequence that looks fine on paper can turn out to be physically un-formable if a previous bend blocks tool access — which is exactly the kind of problem that's far cheaper to catch during flat-pattern review than after the part is already in production.
The flat pattern itself has to account for bend allowance — the amount of material that gets consumed or stretched at each bend line — so that the finished, formed dimensions match the drawing rather than the flat blank's dimensions. Getting this wrong is one of the most common reasons a formed part comes out slightly undersized or oversized compared to what was designed.
This is also where a laser-cut blank and a formed part connect directly: a well-planned flat pattern accounts for bend allowance and bend relief cutouts at the cutting stage, not as an afterthought once the part reaches the press brake.
- Bend sequence affects tool access on later bends — planned before production, not discovered during it
- Bend allowance in the flat pattern determines whether formed dimensions match the drawing
- Bend relief cutouts at intersecting bend lines are planned into the laser-cut flat pattern, not added after
- Multi-bend enclosure geometry is reviewed as a full sequence, not bend by bend in isolation
Bend Radius, Angle Tolerance, and Material Thickness
Every material and thickness combination has a minimum achievable bend radius before the material risks cracking or excessive thinning at the bend line — thinner gauge material generally allows a tighter minimum radius than heavier gauge in the same material. Specifying a bend radius tighter than what the material and thickness actually support is one of the more common RFQ issues we catch during review rather than after tooling is set.
Bend angle tolerance is typically expressed as a standard angular tolerance (for example, plus or minus a defined number of degrees) unless a specific bend genuinely needs tighter control for a mating fit — similar to linear tolerancing, calling out tight angular tolerance on every bend when only one actually needs it adds cost without improving the part.
Material thickness also affects press brake tonnage requirements and, at the upper end, whether a bend is achievable at all on standard equipment — heavier plate bending is more limited than sheet-gauge forming, which is worth knowing early if your part is on the thicker end of what's typically formed.
- Minimum bend radius depends on material and thickness — tighter radii are achievable on thinner gauge
- Standard bend angle tolerance covers most features; call out tighter tolerance only where fit requires it
- Heavier-gauge plate has more limited forming options than sheet-gauge material
- We'll flag an unachievable bend radius or angle during RFQ review rather than after production starts
From Flat Blank to Finished Enclosure or Bracket
A typical formed part workflow starts with the flat pattern (accounting for bend allowance and relief cutouts), moves to laser cutting the flat blank, then to press-brake forming in the planned bend sequence, and finally to any welding of formed seams or finishing that the part requires. Planning the whole sequence up front — rather than quoting each step in isolation — is what keeps a multi-operation formed part on schedule.
For parts that need welded corners or seams after forming (a fully enclosed box rather than an open bracket, for example), the forming and welding sequence has to be planned together, since welding after forming can introduce heat distortion that needs to be accounted for in the fit-up.
If your part is a formed enclosure that also needs a finish — powder coat, plating, or a specific surface treatment — that's typically the last step in the sequence, applied after any post-form welding and cleanup, and we'll quote the full sequence as one part flow rather than as disconnected steps.
- Typical sequence: flat pattern design → laser cutting → press-brake forming → welding (if needed) → finishing
- Welded seams after forming need heat distortion planned into the fit-up, not addressed after the fact
- Finishing is typically the final step, applied after all cutting, forming, and welding is complete
- We quote the full multi-operation sequence as one part flow, not separate disconnected orders
What Affects the Price
Every RFQ is reviewed against your drawing before it's quoted. These are the factors that move the number most.
Number of bends and setup complexity
Each unique bend in a sequence adds setup and press-brake time; simple single-bend brackets cost less than multi-sided enclosure geometry.
Material and thickness
Heavier-gauge material requires more tonnage and generally costs more per part, and may limit achievable bend radius.
Bend tolerance requirements
Standard bend angle tolerance covers most parts; tighter tolerance on specific bends for mating fit adds cost on those features.
Downstream welding and finishing
A formed part that also needs welded seams and a finish coat is quoted as a full sequence, priced accordingly.
Common Questions
It depends on material and thickness — thinner-gauge material generally supports a tighter minimum bend radius than heavier gauge in the same material before risking cracking or excess thinning. Send us your material, thickness, and desired radius, and we'll confirm whether it's achievable or suggest an adjusted radius during RFQ review.
Both — press-brake forming handles everything from a single-bend bracket to a multi-sided, multi-bend enclosure. Complex enclosure geometry requires more setup and a carefully planned bend sequence, which we review with you before production to confirm every bend is actually reachable by the tooling in the planned order.
Bend allowance is the amount of material consumed or stretched at each bend line as flat stock becomes a formed 3D shape, and it has to be built into the flat pattern so the finished, formed dimensions match your drawing rather than the flat blank. This is planned during flat-pattern design, before laser cutting the blank.
Yes — forming and welding are frequently combined for enclosures that need fully closed corners or seams. That sequence is planned together, since post-form welding can introduce heat distortion that needs to be accounted for in fit-up, and we quote it as one connected part flow rather than separate orders.
A standard angular tolerance applies to most bends unless a specific feature needs tighter control for a mating fit. As with linear tolerancing, calling out tight tolerance on every bend rather than just the ones that need it adds cost without improving the finished part — we'll help you identify which bends actually need it.
Explore Related Capabilities
Need sheet metal forming?
Send your drawing, material, and quantity, and we'll confirm the right process before anything is quoted.